An app that converts .csv coordinate files from airfoiltools.com into SolidWorks curve files, then lets you place, pitch and offset each airfoil and build whole wings from them, updating the curves in place inside SolidWorks.
Airfoiltools.com, a common tool for generating airfoils for CAD, gives each airfoil as a CSV of points. The file carries extra information that isn't always needed, and it isn't in a form SolidWorks' Curve Through XYZ Points import accepts.
Converting airfoils by hand was slow. Changing them afterwards (offsetting, editing the trailing edge, moving the section) often ran into rebuild errors in SolidWorks or meant a fresh export from airfoiltools.com, sometimes with the coordinates recalculated. Worst of all, placing one on any plane other than XY, YZ or XZ meant transforming every coordinate in the file by hand.
The converter started as the first step and has taken over the rest one problem at a time, so that most of the workflow and calculations happen in the app rather than in SolidWorks.
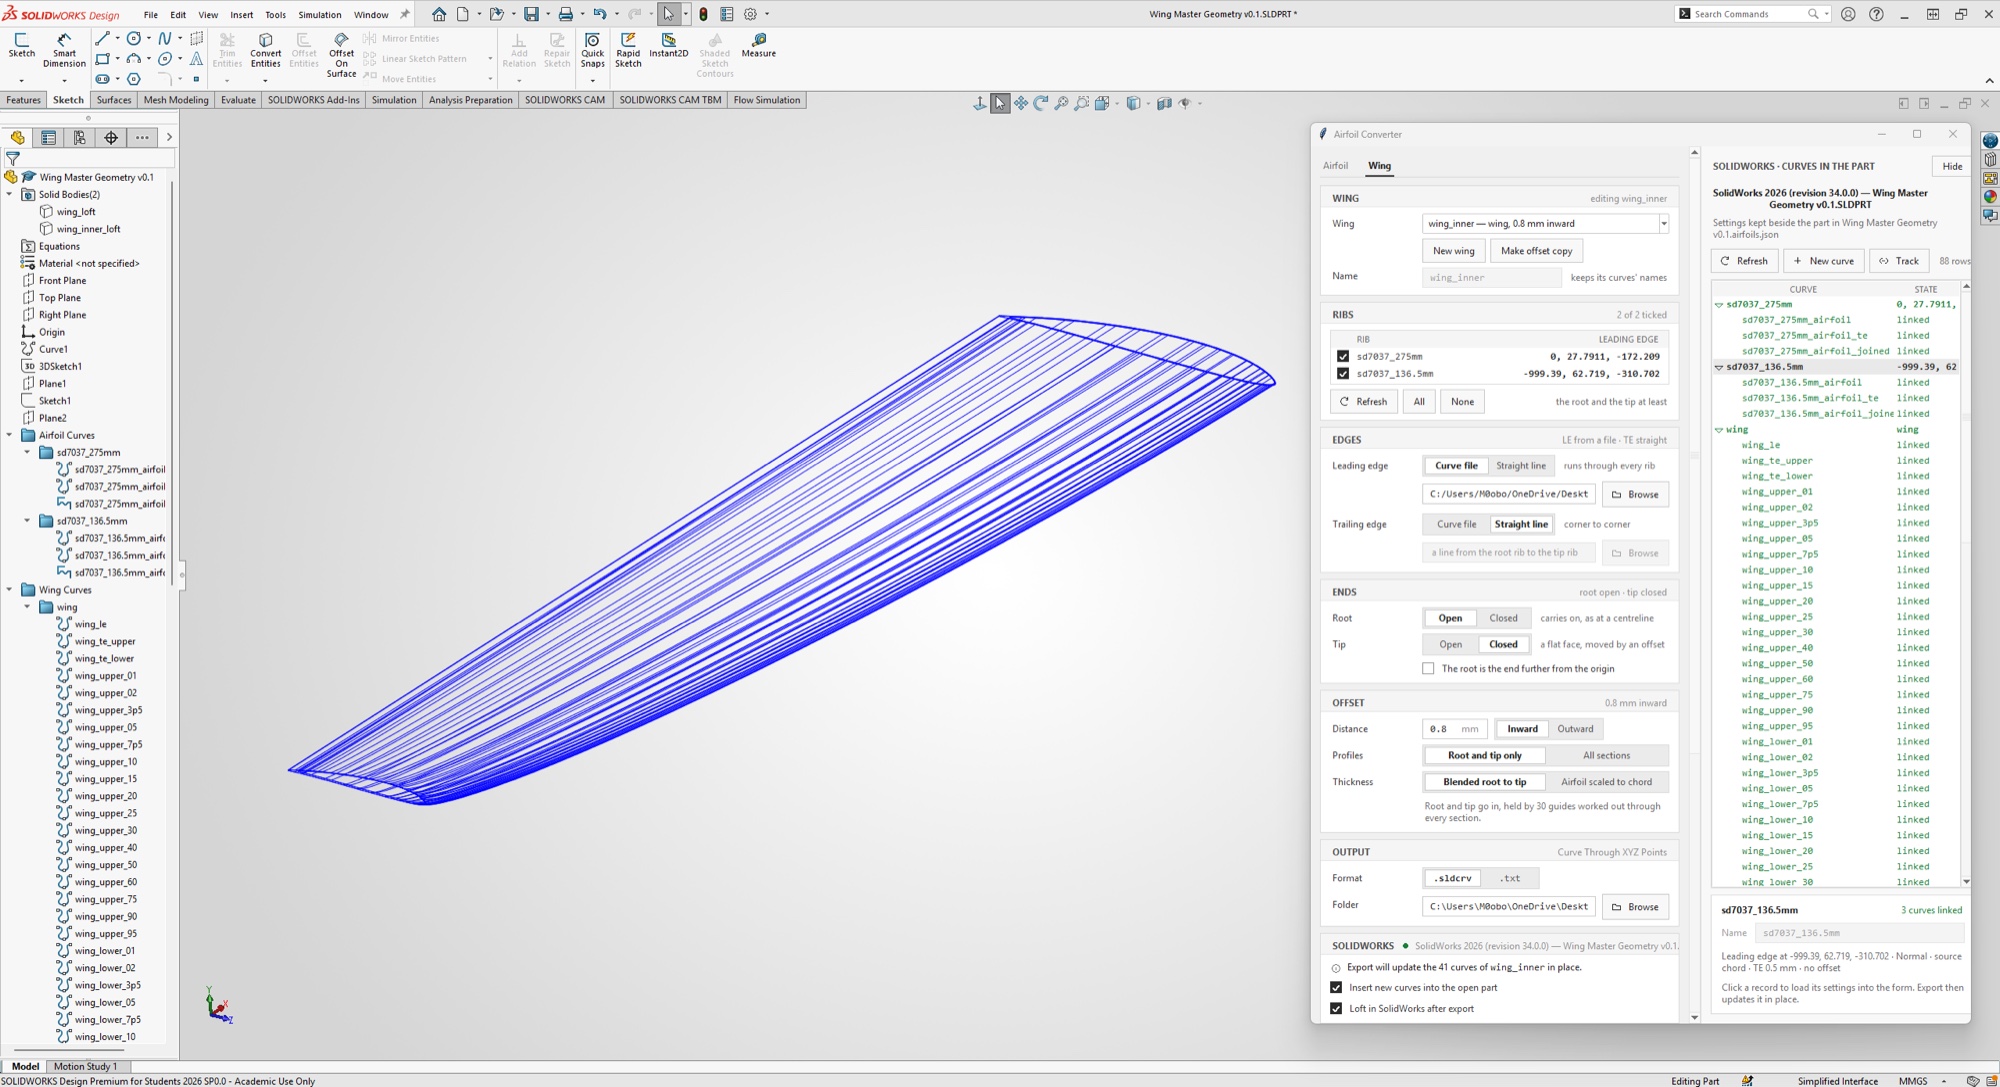
ImageThe Wing tab beside SolidWorks, building an inner wing offset 0.8 mm
CSV to Curve File
The first version read an airfoiltools.com CSV and wrote a SolidWorks Curve Through XYZ Points file (.sldcrv or .txt).
It also placed the airfoil while converting it. The CSV from airfoiltools.com usually puts the airfoil in the XY plane, which isn't always where it should be, as a wing often requires the airfoil to be on a specific plane, at a specific position and size. From the first day the app let you choose the plane (XY, YZ, XZ, or a plane through points you enter), set where the leading edge sits, which way the chord and the top of the airfoil face, and rescale it to a new chord. Angle of attack followed three days later.
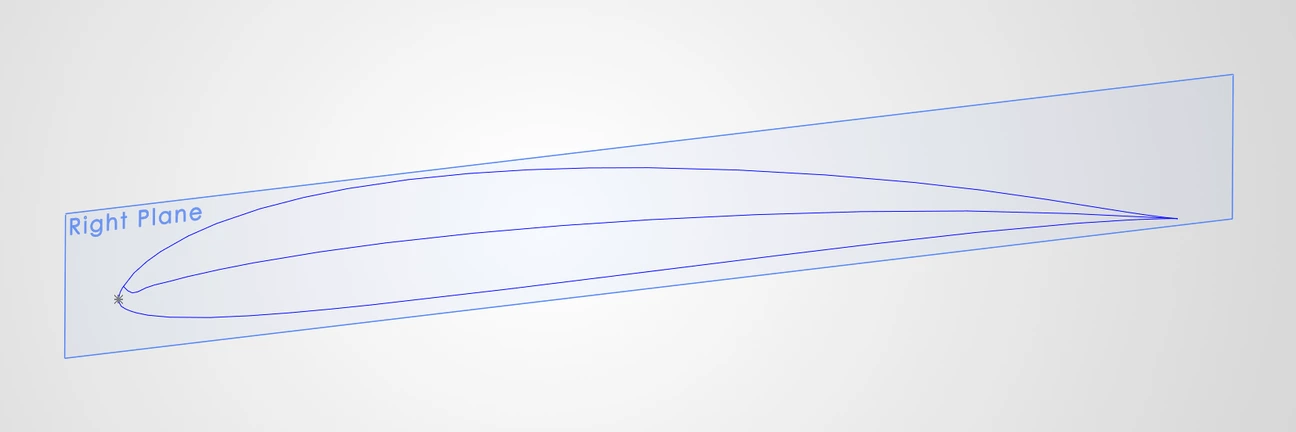
OutThe curve file, on the YZ plane: nose at the origin toward +Z, 2° angle of attack
ImageThe converted curve on the Right (YZ) plane, nose on the origin
Offset Curves
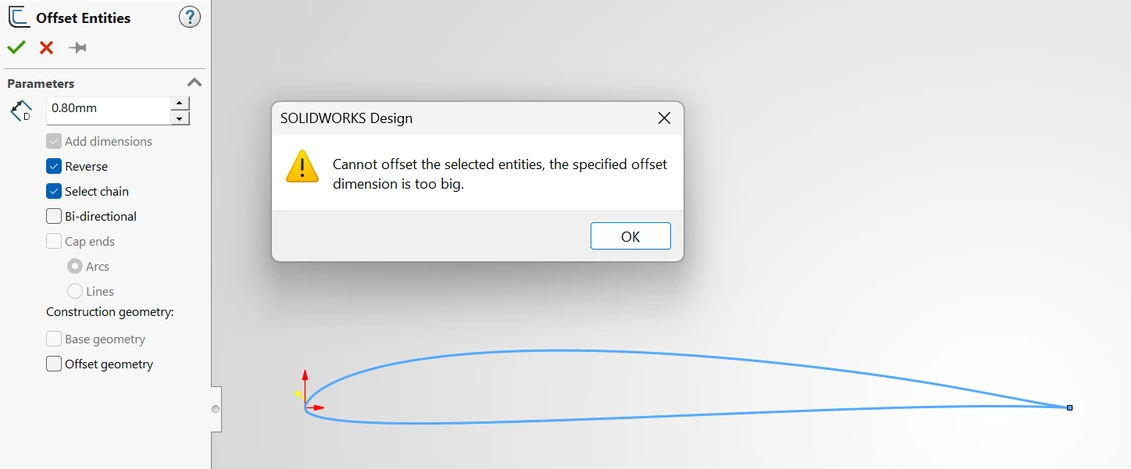
SolidWorks' Offset Entities usually ends in a rebuild error when it offsets an airfoil profile inward. However, an inward offset is often needed: to trim the wing's internal grid for spiral-vase printing (see [the internal-grid write-up] for more), or to build inserts between printed wing sections.
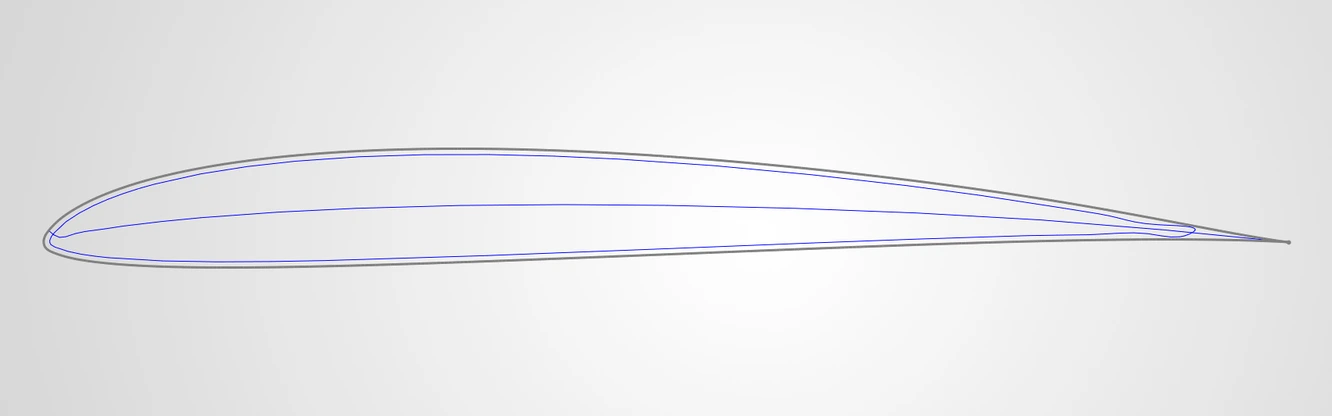
So the converter gained an offset of its own. It offsets the section itself and exports the result as a curve for SolidWorks to import.
BeforeSolidWorks refusing a 0.8 mm inward offset of the sectionAfterThe same 0.8 mm offset, made by the converter and imported as a curve
Printable Trailing Edge
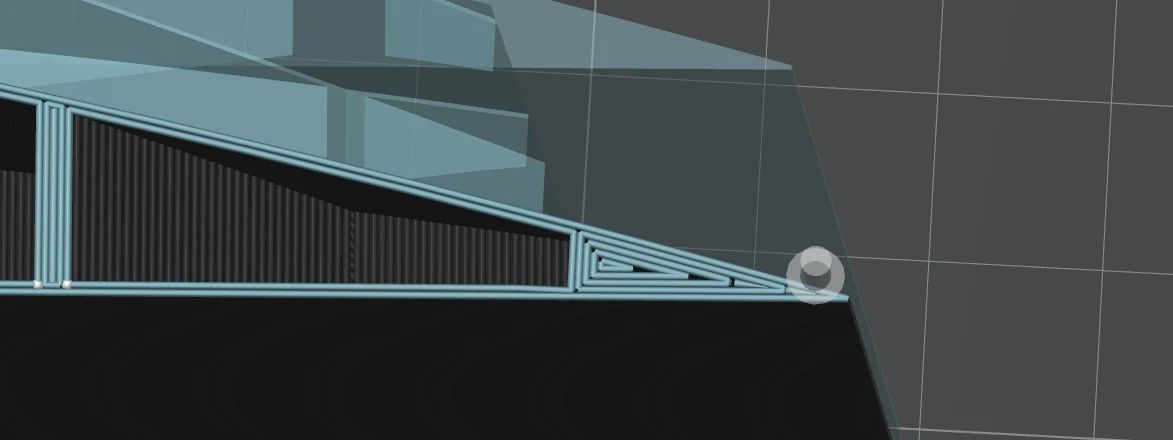
An airfoil exported from its profile usually ends at a sharp point, and the section is extremely thin around it. A printer nozzle can't lay down that point, so the slicer cuts it off on its own, and the printed part no longer matches the part in CAD.
ImageThe slicer’s preview: the model (translucent) runs to a sharp point, the extrusions stop short of it
So the converter gained a trailing-edge thickness setting. It cuts the section back to a vertical line where the airfoil is exactly as thick as the value you set, so the model in CAD already has the blunt edge the printer will actually make.
At first the chord simply ended at the cut, so the airfoil came out shorter than the one designed, and the final chord was hard to predict in CAD.
On 15 Aug the setting gained Keep chord after the cut, which scales the section back up about its leading edge so it retains its original chord while having the blunt edge.
SolidWorks Automation
This update drives SolidWorks directly. Through pywin32 and the SolidWorks COM API, pressing Export inserts the airfoil curves straight into the open part. A curve the app made can also be edited from the app afterwards: change its settings, export again, and the same features update in place, so a loft built on them rebuilds without a reference being re-picked. This cuts out most of the manual clicking and speeds the process up considerably, and it makes the airfoil curves in a design much easier to keep track of.
VideoExport inserting the SD7037 section and its camber line into the open part
Placing the V-tail of RC v2 showed how much was still worked out by hand: an airfoil on a plane that isn't aligned to any axis needed its plane points, leading edge and chord direction calculated and typed in. So the app learned to read them straight from SolidWorks.
Click a reference plane or flat face, then optionally a straight edge or sketch line for the chord and a sketch point or corner for the leading edge. While a pick is running, the app checks SolidWorks' selection five times a second through the COM API and treats each change as a click. It asks each selected object for its geometry: a plane or face gives its normal and a point on it, an edge or sketch line its two ends, a point its position. From these the app fills in the form: three points that define the plane, the leading-edge position, and which way the chord runs.
VideoPicking a plane, a chord line and a leading edge in SolidWorks, then exporting the airfoil onto them
Wing Tool
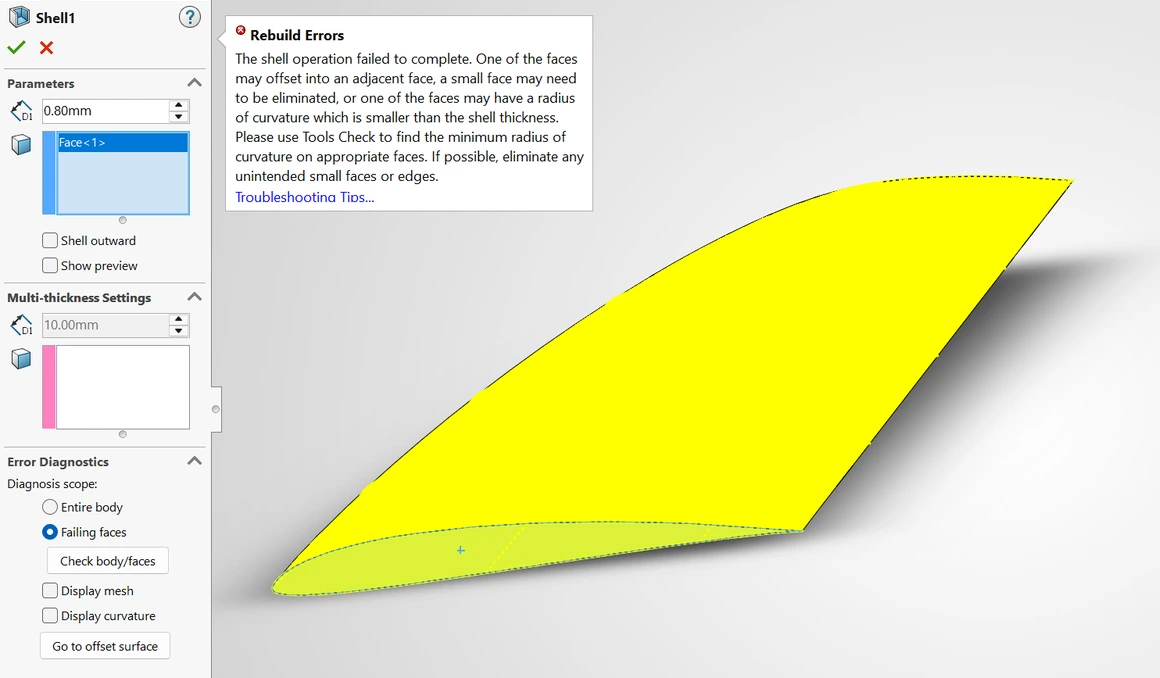
Working on the wing of RC v2 raised a harder problem. SolidWorks' Shell refused to shell the wing, failing with rebuild errors, and the app's own offset only works on flat airfoil profiles, which doesn't hold up along RC v2's curved leading edge. The wing needed a tool that could offset all of it at once.
ImageShell refusing the wing at 0.8 mm, its failing faces picked out
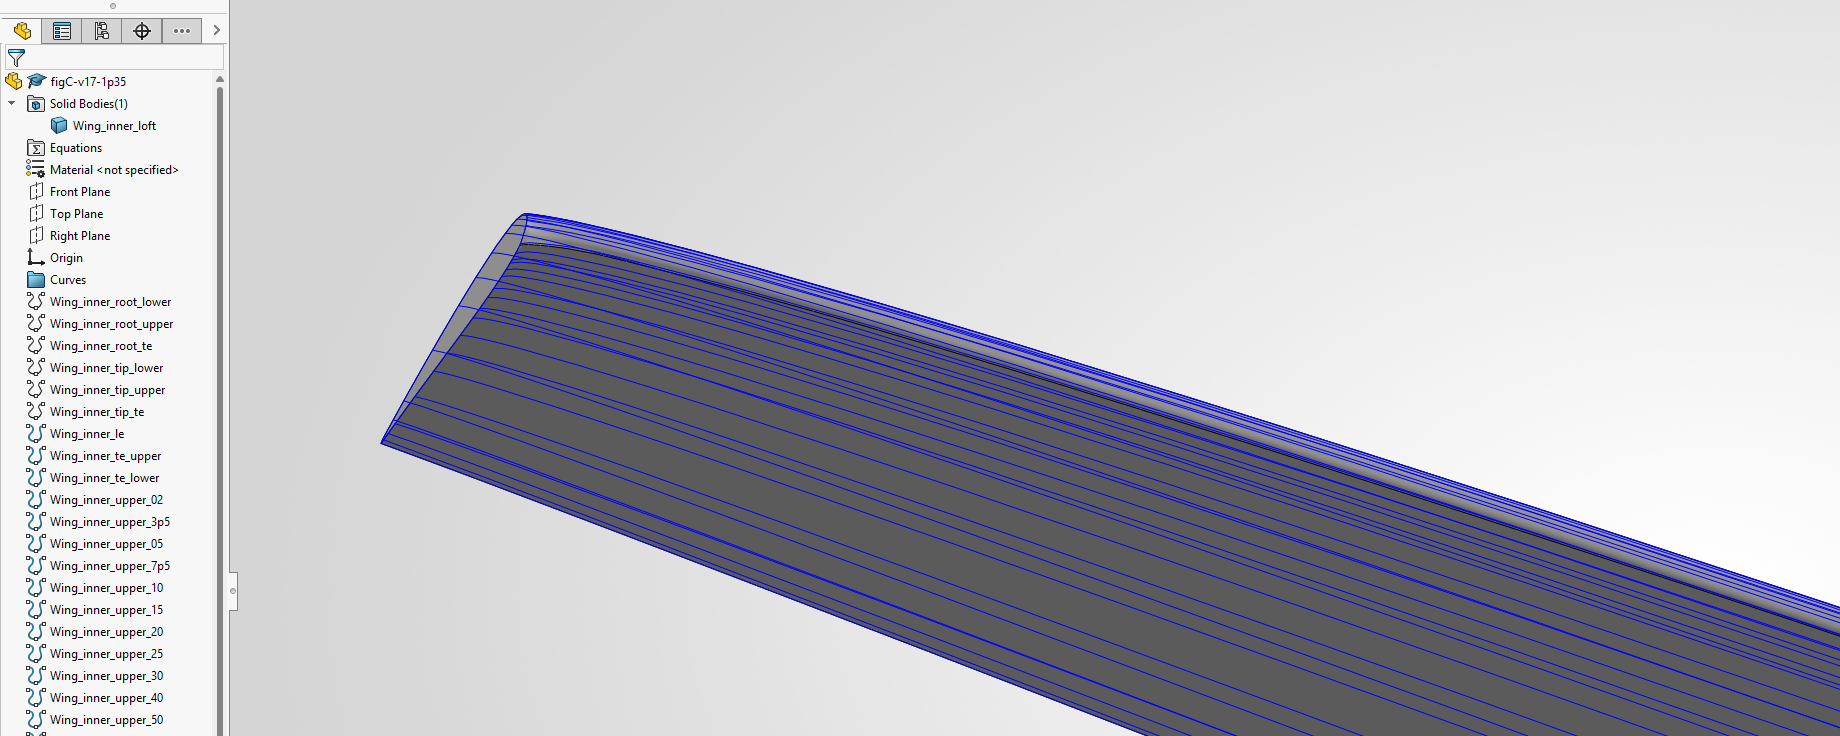
The Wing tab takes the exported ribs and the curves for the leading and trailing edges, and models the wing as close to SolidWorks' own loft as it can. SolidWorks doesn't publish how its loft builds a surface, so the model was matched against real lofts measured in SolidWorks.
On a wing with no taper or sweep, the offset wing could simply be built from the 2D offset airfoil at each section, which the earlier version of the tool already did by hand. On a tapered or swept wing, however, the outer skin is slanted relative to the ribs, so the same offset comes out thinner when measured to the outer skin. To correct for this, the app pushes each point of the offset further inward to compensate for how far the skin leans at that point. Past 20° of sweep, it measures the true 3D distance to the skin instead, adjusting until the offset is right. Where the wing is too thin for the full offset, such as near the trailing edge or around a tight nose, the offset is simply trimmed.
The offset wing goes into SolidWorks as root and tip profiles, edge curves and a set of surface guides that constrain the loft. A combine (subtract) or surface split between the two wings can then create the shell. Measured on the lofted solids SolidWorks built for the test wing below, a 998 mm wing offset by 0.8 mm, 92% of the inner skin is within 0.05 mm of the intended wall and 99% within 0.1 mm. What is left sits in two places: right at the nose, where the wall thins to 0.6 mm at worst, and on the upper surface between half and nine-tenths of the chord.
RenderRC v2’s wing from its exported curves, in the order the app writes them: sections, guides, loft, then the 2.65 mm inner wing inside it
Interactive · the test wing’s sections, root to tip
InteractiveThe 0.8 mm wing as SolidWorks built it, cut every 25 mm from its STEP files. The wall is measured in 3D, inner skin to outer. Drag along the wing to move between sections.
The loft is driven from the app as well. Pressing Loft on the Wing tab, or ticking Loft in SolidWorks after export, selects the profiles and guides and builds the loft in the open part, for both the outer and the inner wing. Where SolidWorks refuses to make a wing as a solid loft, the app builds a surface loft through the same curves instead. The video below runs the current version from one end to the other, an airfoil CSV through to that lofted wing.
VideoThe current version end to end, from an airfoil CSV to the wing lofted in SolidWorks
Export Speed
Using the tool during the development of RC v2 exposed more issues that the next two entries will talk about. First, changing the offset of one of the wing lofts on v2 took 17 minutes to export.
The v2 wing is a 397-feature part, and it turned out almost none of those 17 minutes went on the final rebuild. Each time the app replaced a curve (an offset wing has about 40: the root and tip profiles, each in two halves, the two edges and 30 surface guides), SolidWorks checked the new points against every feature below it in the tree, at about 25 seconds a curve.
So an export now drags the rollback bar up to just below the curves, replaces them, puts the bar back at the end, and rebuilds only the features that changed. That takes roughly half a second per curve instead of 25, and the same wing now exports in 29 seconds, with identical geometry.
Solid Lofts
Second, the same change to the offset ended in rebuild errors. They came from the inner wing being a surface. On the v2 wing, SolidWorks refused the solid loft at every offset from 1.30 to 1.40 mm, so the app fell back to a surface loft through the same curves. To split that into a separate part for each section of the wing, it first had to be made a solid, which meant closing the root and tip by hand with Filled Surface. But changing the offset refreshes the curves, and Filled Surface can lose the airfoil edge it was referencing, so the rebuild failed as soon as the app rolled the tree forward again.
The first fix, on 22 Sep, built the solid the other way round: a surface loft, a flat cap across each end, and a knit of the three into one solid under the loft’s name, so features built on the loft keep their reference. Wherever SolidWorks can make the solid loft directly, the knitted solid comes within 0.006% of its volume. Measured on a copy of the part, the refusals seemed to come from one guide. With the lower-surface guide at 2% of chord included, the loft grows a fourth, sliver face at the nose beside the upper, lower and trailing-edge faces. So if a cap failed, the app lofted the surface again with fewer guides, dropping that one first.
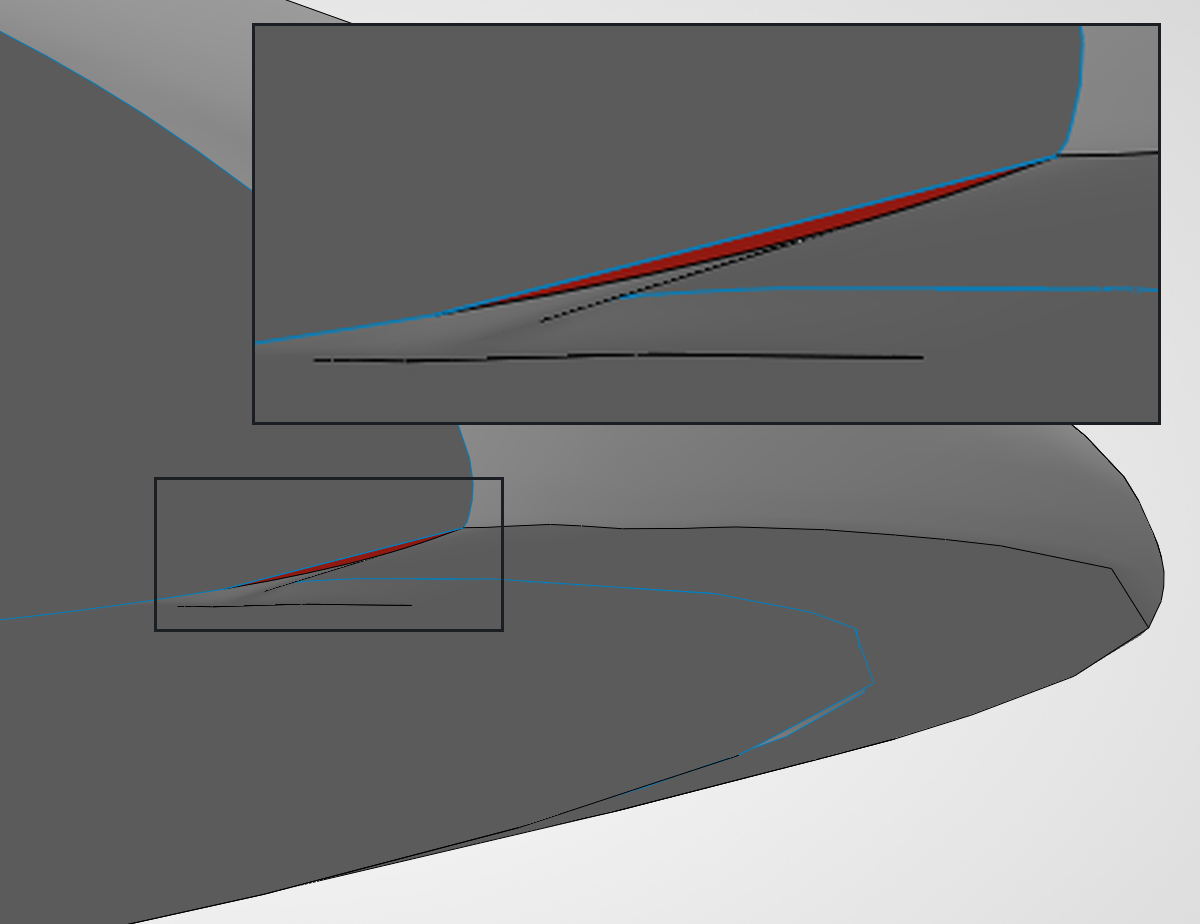
The result is checked rather than trusted. On one set of guides, SolidWorks capped the tip end across only the small loop the sliver leaves there, 0.078 mm² against the 4,047 mm² of the cap across the wing root’s profile, and after knitting reported a solid, though the wing was still open at the tip, a sheet rather than a solid. A cap now has to cover at least half of the area of its profile, and a knit must have created a new solid body.
ImageThe tip end at 1.30 mm, capped only across the sliver (red, enlarged)
BeforeThe solid loft refused at 1.35 mm, with the sliver face at the nose picked outAfterThe same curves as a surface loft, less the lower 2% guide, capped and knitted into one solid
The real issue was found the next day. The app exported curve files to 6 decimal places of a millimetre, which can leave a section up to half a millionth of a millimetre off its 2D plane. SolidWorks checks whether a section is flat more strictly than that, so some of the sections the app exported were seen as 3D curves instead of 2D ones, and the solid loft refused them. Since the app was changed to export to 10 decimal places, all 22 sections of the same offset wing loft as a solid.
The inner wing’s nose is drawn more carefully as well. Where an inward offset leaves a tight nose, it used to come out as three or four points about 50° apart, a loop SolidWorks could not close with a face. It is now drawn as an arc in 10° steps.
Wing Accuracy
Now that the wing and its offsets loft as solids, I also looked into the tool’s accuracy. Lofting through just the root and tip airfoils has its limits. An inward offset can turn the curve at the leading edge into a sharp crease. Where the leading edge curves with a radius smaller than the offset distance, the offset cannot stay round and closes into a corner, forming a crease along the span. The app now makes sure that corner is kept, where it could previously cut a straight line across it.
The crease does not look the same all along the wing. The wing tapers, so its nose gets tighter towards the tip: on a wing offset 0.8 mm, the inner root’s nose stayed round while the tip’s came to a corner. A loft through only the root and tip knows the nose at those two ends, and between them it has only the leading-edge guide to follow. SolidWorks fills in the rest with a smooth blend, which cuts across the crease instead of following it. On the 1.35 mm wing, the wall held to ±0.05 mm over only three quarters of the surface.
So every wing now lofts through all of its sections instead of just the root and tip. Each section forces the loft to follow the true shape where it sits, giving it very little freedom to cut across the crease in between. This change also benefited the outer wing, which previously sagged up to 0.08 mm off its intended shape.
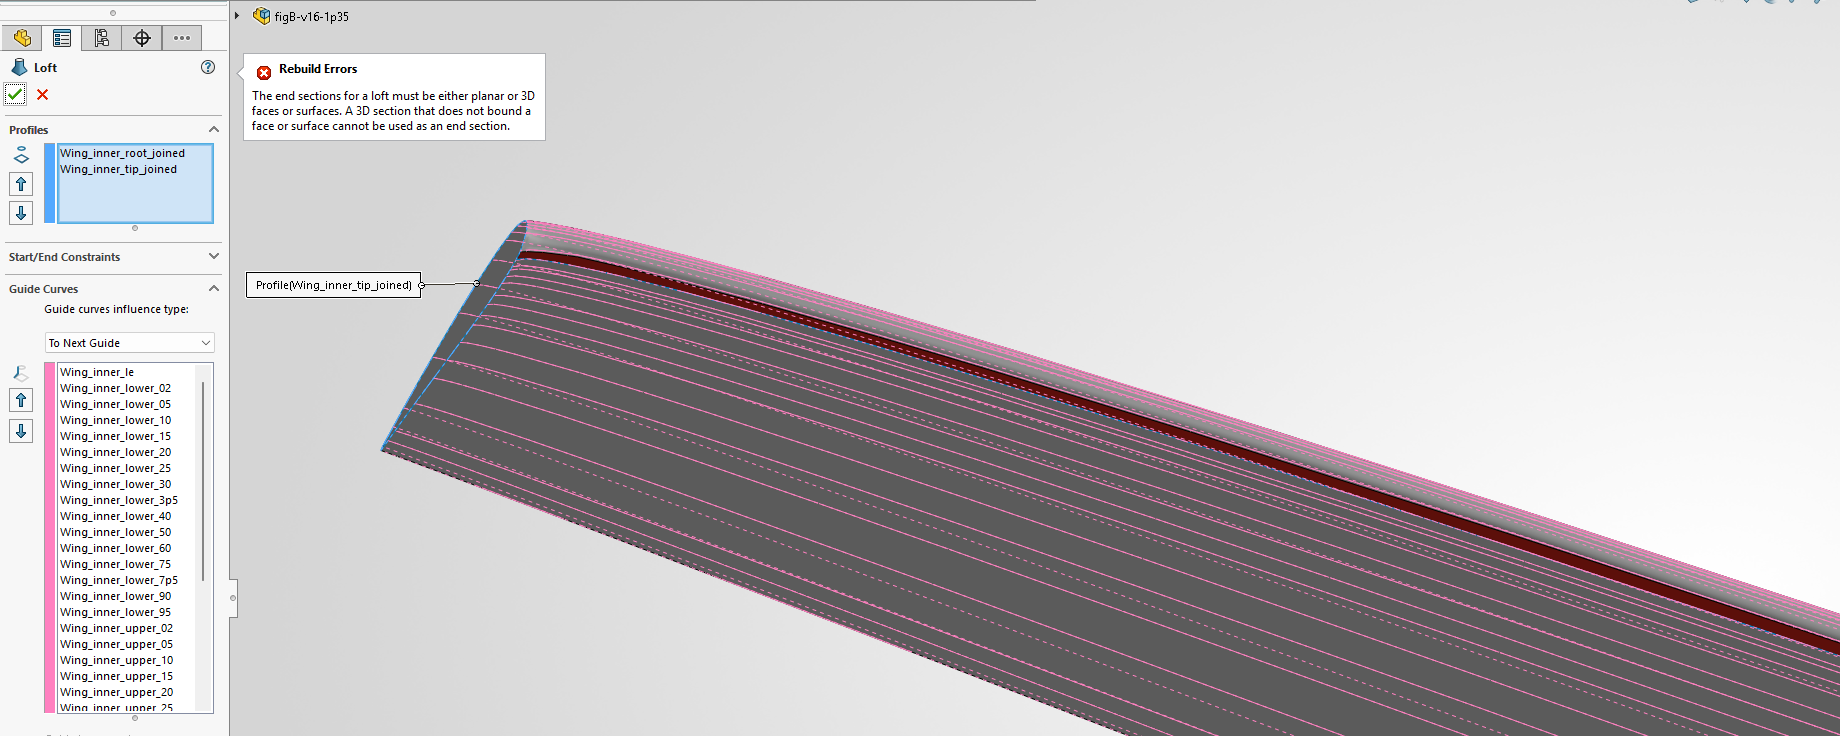
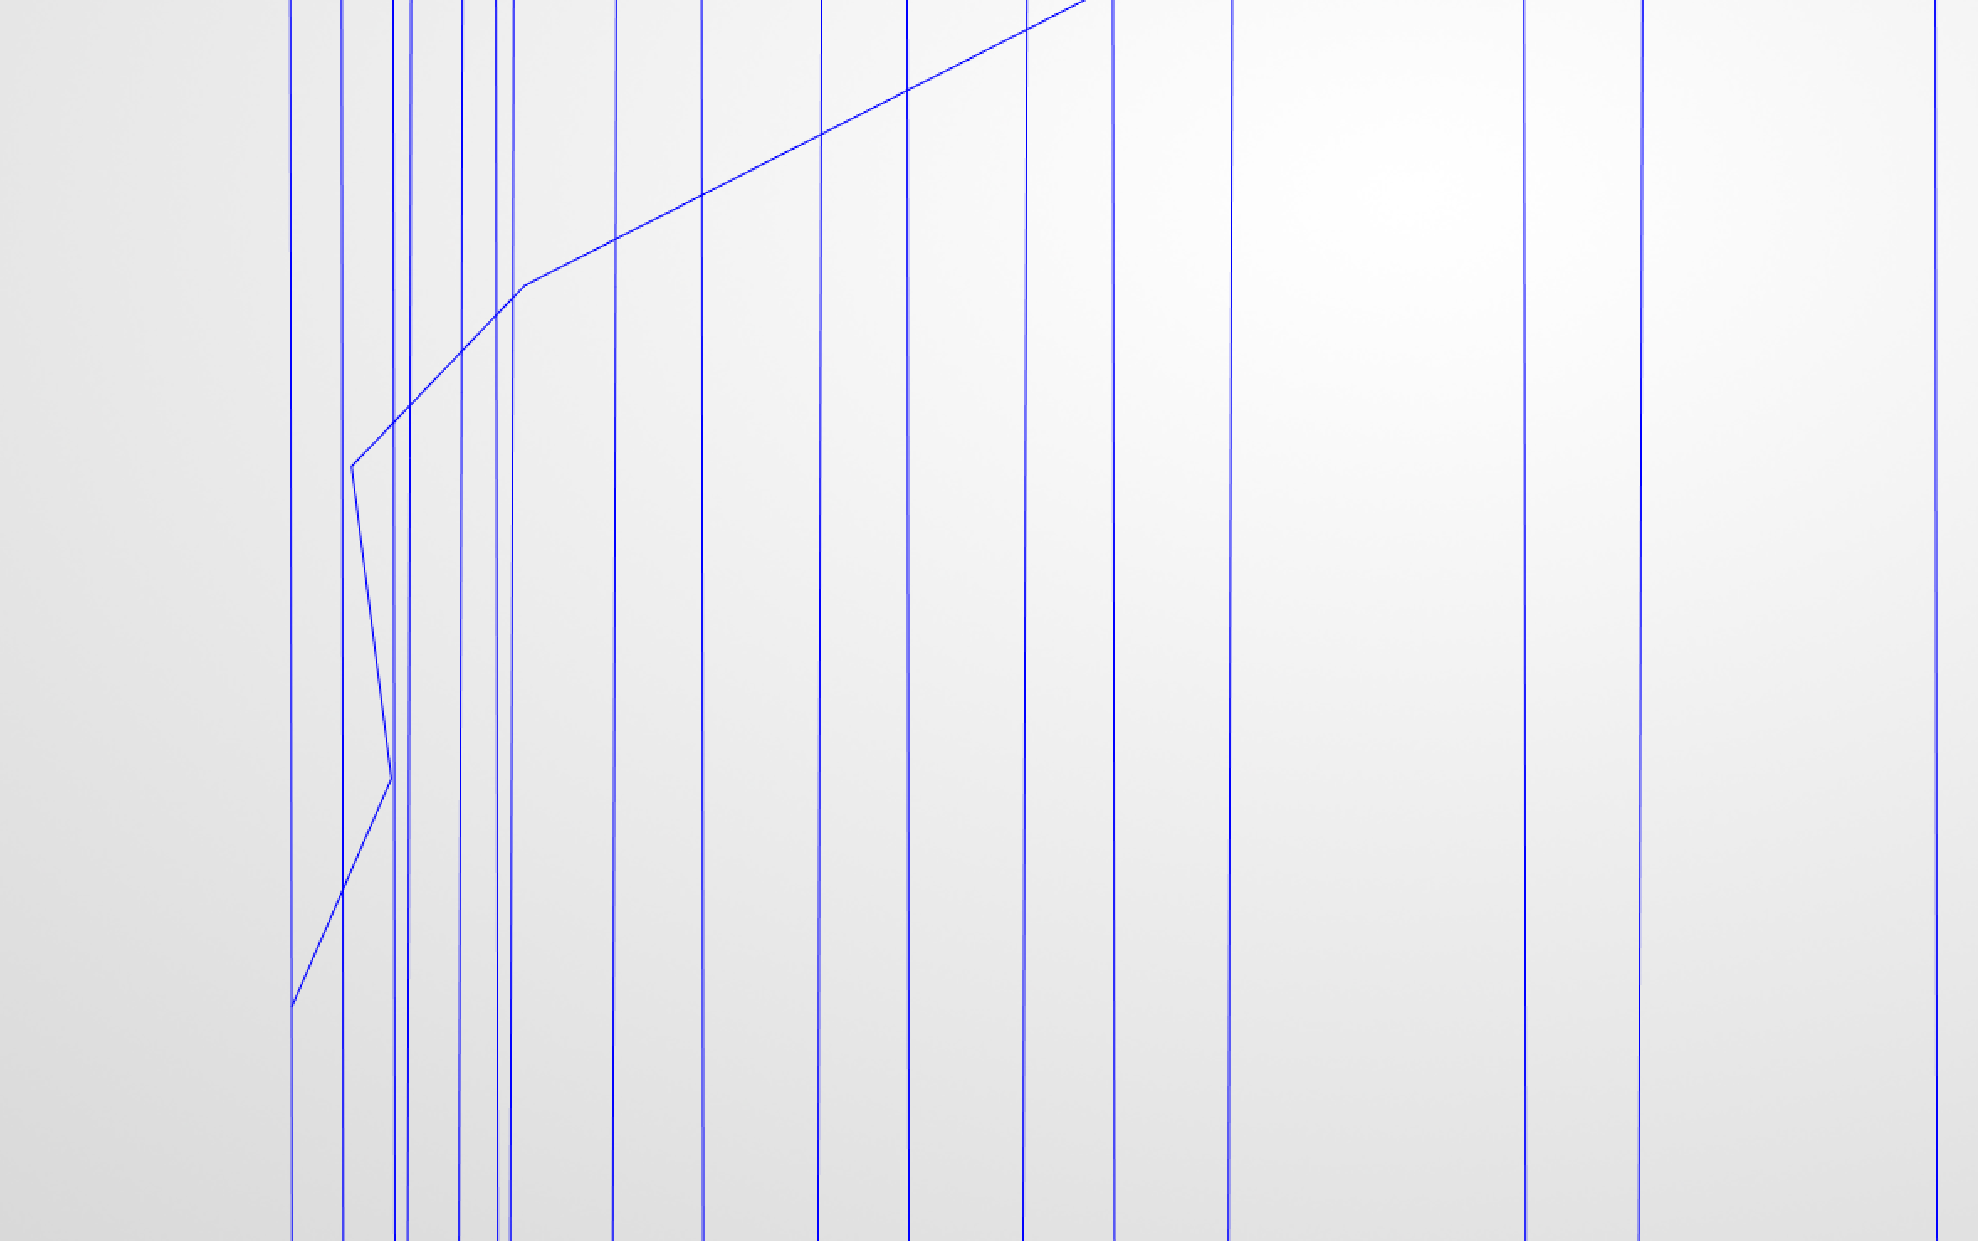
This change also meant changes to the guides. Each guide runs along the wing at a set place on the chord, such as 30%, and it used to pass through whichever point of a section was nearest that place, which could be up to a millimetre off where the points were sparse. With sections close together, the guides zigzagged from one section to the next, too sharply for SolidWorks to loft through. Now every section gets a point of its own exactly at each guide’s place on the chord, so each guide passes through the same place on every section and runs smoothly along the wing.
ImageThe lower 60% guide near the tip, zigzagging between sections
After these changes, 99.9% of the inner skin is within 0.05 mm of the intended wall, compared to 91.0% for the 16 Sep version, measured from STEP files of the 1.35 mm inward offset.
Interactive · the same 0.8 mm test wing, rebuilt and lofted by v1.8
InteractiveThe same 0.8 mm wing, rebuilt and lofted by v1.8. Drag along the wing to move between sections.
More Solid Loft Fixes
Another issue came up with solid lofts. On some offsets, SolidWorks refused the solid loft with the error Cannot knit sheets together. Each offset section was split into an upper and lower half at the point where it turned the hardest, while the leading-edge guide ran through each section’s foremost point. Near the wing tip, where the leading edge sweeps back sharply, those two points were no longer the same spot, so the guide wandered across the seam between the upper and lower faces.
The issue was fixed by forcing each section to split at the leading edge (its foremost point), so the seam now runs along the leading-edge guide. After this change, 17 offsets ranging from 0.5 to 3.0 mm all lofted as one solid body with no errors or fallback.
Next
The wing offset now lofts as a solid at every offset tested, with 99.9% of the wall within 0.05 mm. More will be added as new problems show up in future projects. What was learned here is also being carried into a new project currently in progress.